
300x600
If you are dreaming this year of a garden with less weeds, little maintenance and big yields, then a no till garden is the way to go!
A no till garden is not only neat and weed free, but incredibly productive.
We created our first no till, raised row garden 9 years ago. And with each passing year, it continues to produce more vegetables, all while becoming easier and easier to maintain. Best of all, it is 100% organic!
The Benefits Of A No Till, Raised Row Garden
- Little Weeding. Using natural mulch and a no till method, weeds are nearly eliminated. And so are weeding chores! With the use of cover crops in the fall, weeds are kept at bay for the following year too.
- Better Soil and Better Harvests. Using simple cover crops, mulch and compost, the garden soil continues to improve organically each year. No expensive fertilizers needed, nor a rototiller either!
- Less Watering. The raised row set-up keeps plants protected and insulated. That means less watering, and better root structure development for plants.
- Never Waiting To Plant. In a traditional tilled garden it can take weeks to let the soil dry from spring rains, all just to till and plant. With a simple no-till garden of raised rows, planting can be done right after the hardest of rains!
How To Create A Simple No Till Garden
So how easy is it to create a No Till Raised Row Garden? Way easier than you might ever think!
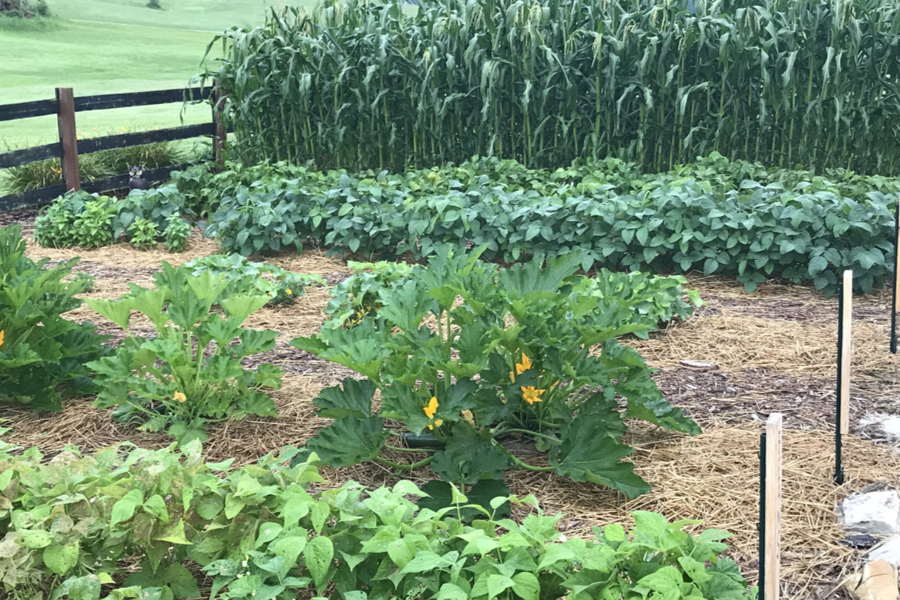
You can grow anything you want in a raised row garden
Below are the basics on how to create and maintain your very own no till raised row garden. For a complete, step by step full-color look, be sure to check our book Raised Row Gardening. With nearly 200 pages of full color photos, illustrations and advice, the top selling book covers everything from A to Z on Raised Row Gardening, including composting, companion planting, cover crops and more!
Creating Your Raised Rows
If starting from a grassy, never before gardened area, mow the area as close to the ground as possible.
This is the one and only time you could use a rototiller to break up the sod, but it is certainly not necessary. We built our first raised rows right on top of the ground, without ever using a tiller at all.
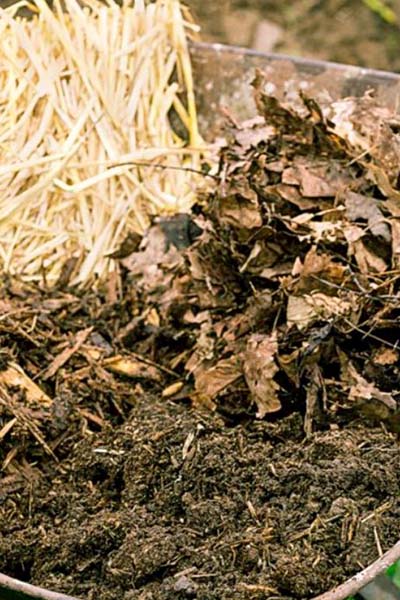
Using basic organic materials, you can create a nutrient filled garden with ease.
Beyond that, there will never be a need to till your garden again. Tilling only creates more work, and more weeds. In addition, it can actually harm your soil in the long run. See : Why To Never Till Your Garden
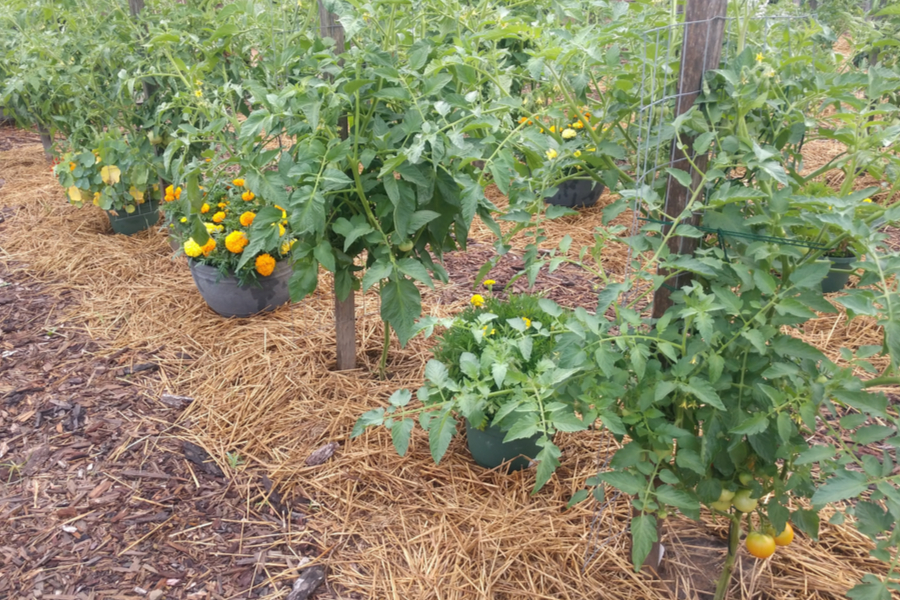
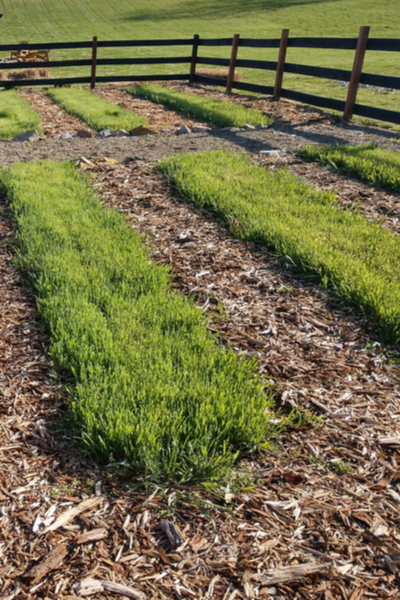
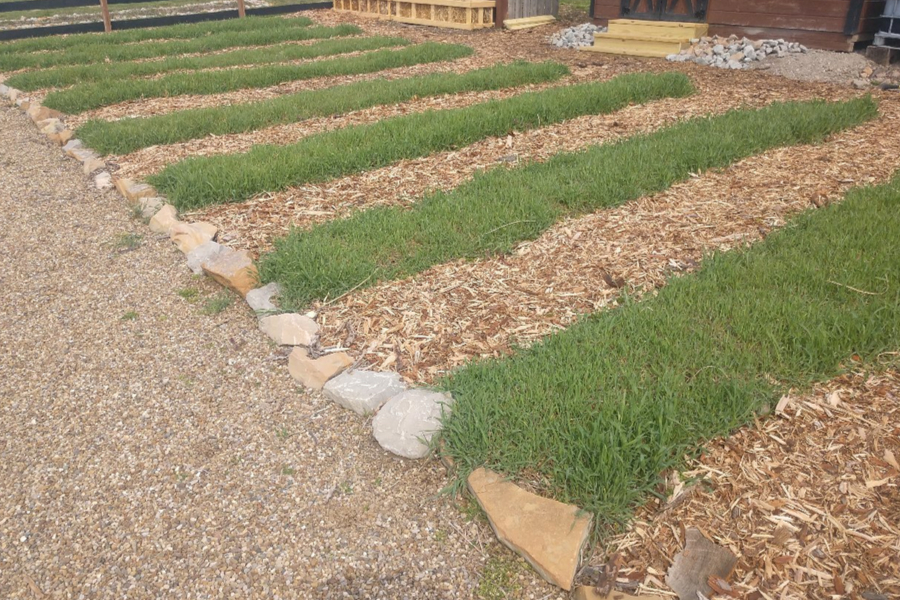
We create our raised rows at 18″ wide x 20′ long, with 24″ to 30″ between rows left open as a walking space to maintain plants with ease.
To create our first rows, we laid down a combination of straw and compost 4 to 6″ high, then added a 2 – 4″ layer of topsoil on top tapering it down to the edge of the rows. It eventually will compress to about 6″ in height in the middle of the 18″ rows.
Completed raised rows after planting, with the waking rows mulched in between
If you happen to be starting from an existing garden space, create your rows with the straw / compost mix and simple use the existing soil to place on top.
Mulch Your Walking Zones
Once your growing rows are built, it’s time to mulch the walking zones.
For walking zones, we use a thick layer of inexpensive organic material to block weeds permanently. This eliminates a large portion of the garden from ever having to be maintained.

By mulching the walking rows permanently with a deep layer of mulch, you eliminate a huge portion of ongoing garden work.
We use hardwood bark chips for our rows, but you can use straw, leaves, or whatever is available locally and inexpensively. To provide extra weed control the first year, you can first put down cardboard or newspaper to help snuff out any existing weeds.
By mulching these non-active areas permanently, you immediately take out 75% percent of the work in a traditional garden. Area that is never needed for growing shouldn’t need to ever be tilled or maintained.
Plant And Mulch Your Growing Rows
Planting time is a snap. For transplant crops like tomatoes, peppers, cabbage and more, we use a post hole digger to plant in minutes.
We dig the hole with one drop of the blades and plant. For seed crops, we create furrows with a hoe or pick to plant in rows.
We then cover the growing rows with a mulch of straw, compost, shredded leaves or grass clippings. The key is to keep soil covered so weeds can’t take over. Each year, the soil is disturbed less, and the weeding chores drop as well.
Plant A Fall Cover Crop
At the end of the first year, the real magic starts to happen.
Each fall, we plant the growing rows with a thick cover crop of annual (cereal) rye. It quickly fills the rows with a lush, protective, dark green blades of grass. (See : How To Plant A Cover Crop)
A cover crop recharges your garden soil as it grows and then breaks down the following spring. It also helps to fix nitrogen in the soil, and replenish valuable nutrients and minerals.
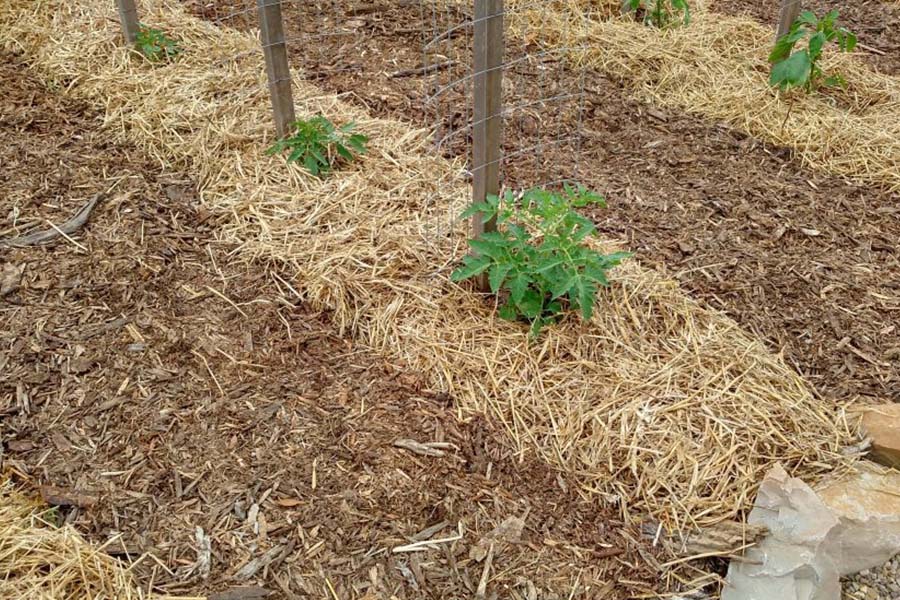
The fall cover crops growing in the raised row garden. Cover crops help re-energize and protect the garden from weeds.
More importantly, the thick growth in late fall and early spring protects bare soil from weed seeds blowing in.
It eliminates a large portion of any weeds that can ever find space to grow in the garden. If that isn’t enough, the roots of the cover crop help break up and loosen the soil below the surface. The result, subsequent crops find it easier and easier to grow deep into the rich soil.
Mow Off – And Plant Again In The Spring
And the absolute best part of all comes the following year, and every spring after. You will never need to use a tiller again, or use back-breaking muscles to turn over your soil.
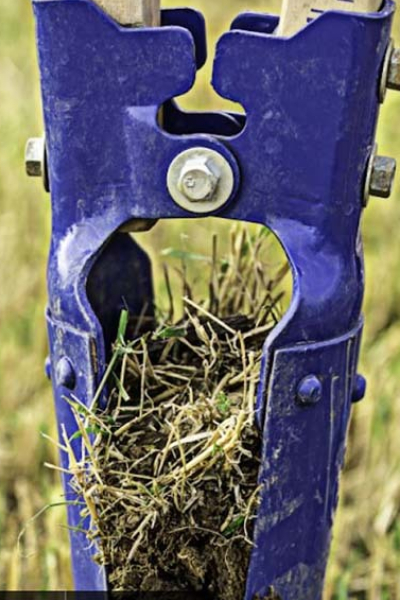
All you need to do is start mowing off the cover crop in the early spring, and after a few times, it dies off.
The cover crops will begin to die off after mowing off a few times in the spring.
There is never a need to disturb the soil, or replant thousands of weed seeds by tilling. And the cover crop clippings can be left in the growing rows to decompose, or added to your compost pile to fuel it as well.
By the time you are ready to plant, the annual rye has died off. You can then use a post hole digger to easily create planting holes.
The soil below gets better every season. Better yet, planting chores are finished in minutes, not hours! To complete the process full circle, we mulch the growing rows again after planting. And it once again protects growing rows from weeds during the growing season.


0 Comments